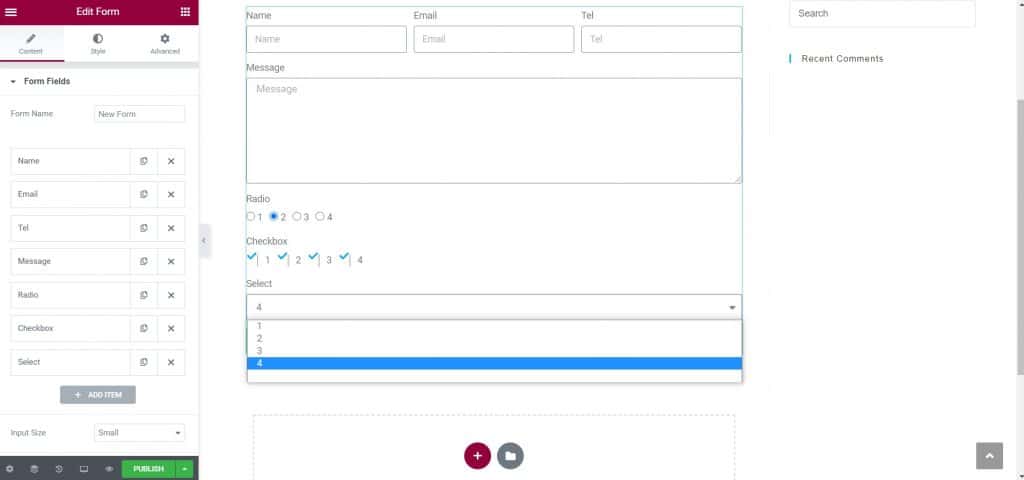
In this text you will learn more about the form plugin, with a few changes you can get a form that looks great and works great on your site.
The first thing we're going to do is find the shape plugin in Elements and drag it to the middle. When we click on styling the form, you will see Content and Style sections. Under the Content section, the functionality of the form changes, under Form Fields you can add what you want to ask for from the data of people who come to the site. You can add, duplicate or delete as many fields as you like. When you click on one field, e.g. To us, E-mail or Phone, you will be shown all the settings of that field, what type it is (in the picture below you can see what type the field can be), what is written inside the field before you enter the data, whether it is a mandatory field and what is the width of the field.

You can place more fields in one row by adjusting the field width, if you want 2 in a row, set the width to 50%, if you want 3 in a row, set the width to 33% and so on.

As for the field Message, it is a type field Textarea and it represents a field for sending an arbitrary message, within it, in addition to the things already mentioned, you can also change its height, that is, the number of lines in which it is possible to write a message.

There is also a field Number, which is similar to a field Phone, numbers are also entered, the difference compared to the Tel field is that you have the option of setting the minimum and maximum value. Then there are the fields Radio, Select and Checkbox, which are similar to the above, but you adjust which options the user has to choose from. The code Radio fields, the user chooses between the radio buttons what he wants, the code Select fields, the user selects from the drop-down menu and with those fields it is possible to choose only one option, and the code Checkbox field, the user ticks off what he wants and it is possible to select several offered items. The code Checkbox and Radio field, you also have the option of whether you want the offered options to be in the same row or not.

There is also url field, in which you enter a web page. Then there are Dates and With that fields, where you enter the date and time. There are also fields File Upload, within which you can hang a document, you can set the maximum file size in the options, then limit the type of file, as well as limit whether it is possible to add only one or more files.
There is also a field reCAPTCHA, which provides additional security to the site from spam, within which the user must confirm that he is not a robot.
As for other settings, there is a possibility to adjust the size of the form, whether it will be smaller or larger. Then, within the option Buttons you can adjust how the buttons will look, what size, what will be written on them, what alignment they will have, whether they will have an icon, and the like. When you select an icon, 2 more options appear, the position of the icon (before or after the text) and the space in relation to the text.

Once we have formed the structure of the form, the next thing that needs to be set up E-mail option. Within it, we set to which email the data from the completed form is sent (by default, the site administrator's email was set when the site was created), how the subject of that email will read, then if we reply to an email, we set which email we are replying from. Then there is Meta Data field, in which we set what will be displayed in the email, e.g. Dates, With that, Page URL etc.

Within the option Actions After Submit set what happens when the user fills out the form and presses the button Send. Data will be collected, an email will be sent, the user will be redirected to another page, etc. Within the option Redirect we are setting up the web page to which we will redirect the user after he fills out the form. Also within the option Additional Options you can set a message that the user will get when they do something in the form, eg. when he fills it in, when an error occurs, when it is necessary to enter a field that he did not fill out.
After we created the form, it is necessary to install the plugin in the control panel Contact Form DB, in which you will see all the data collected using the form, and there you have the option of choosing how you will export the data from the site to your computer, e.g. using an excel document.


