In this text, you will find out how you can add notification badges to the menu, which when you see them on the site, your eyes immediately go to that place and you want to click. See the example in the image below.

Every day, you see notifications from various applications on your phone, and when you see them, you always open the application. In this way, we want to create a website, so that there is such a notification in the menu with the desire that website visitors click on the exact item that we offer them. How to do it, read below.
To create notification badges, you need to enter a specific one CSS code, to all the places where we have the option Custom CSS. You can modify that code depending on what kind of badge you want to make, change the size, color, text, animation, and the like. In your dashboard, in the required section Appearance click on the option Customize. Then when you open it, you find it Custom CSS/JS section and enter the following code from the image within it.
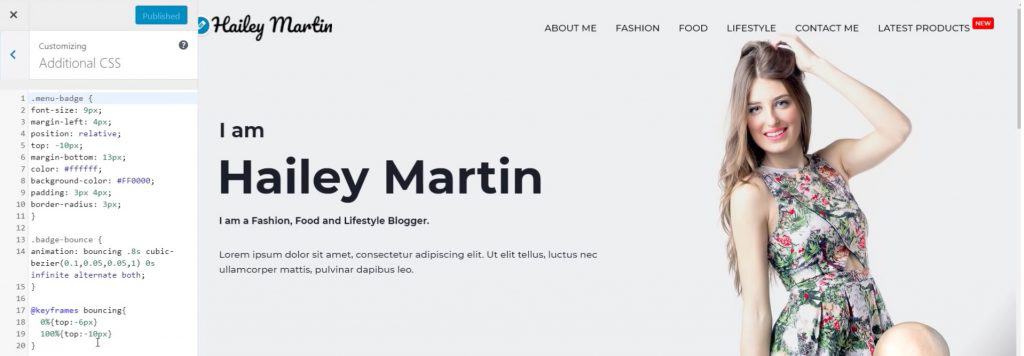
After you have done that, you need to insert the notification badge into the menu. You will do this by clicking on the option in the control panel Menus under the section Appearance.
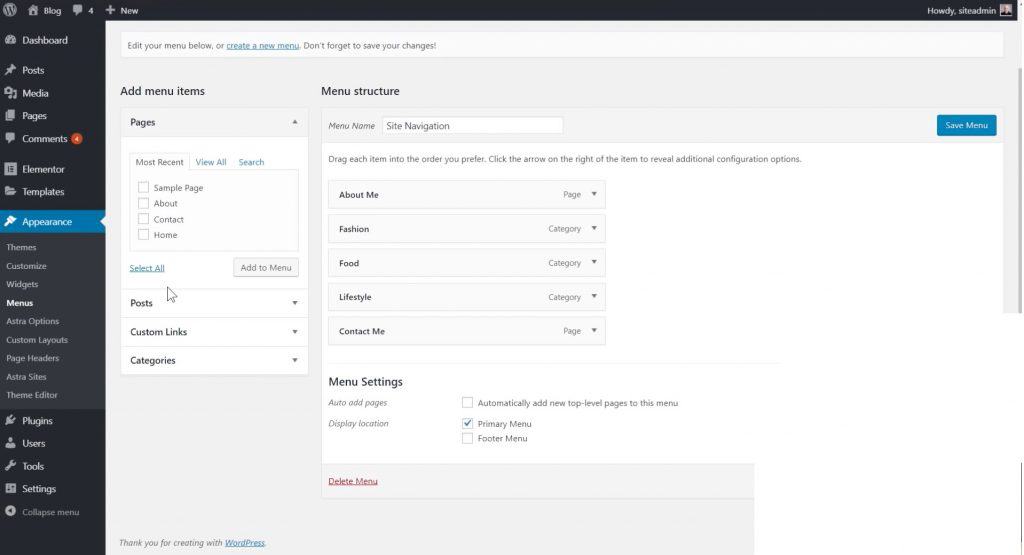
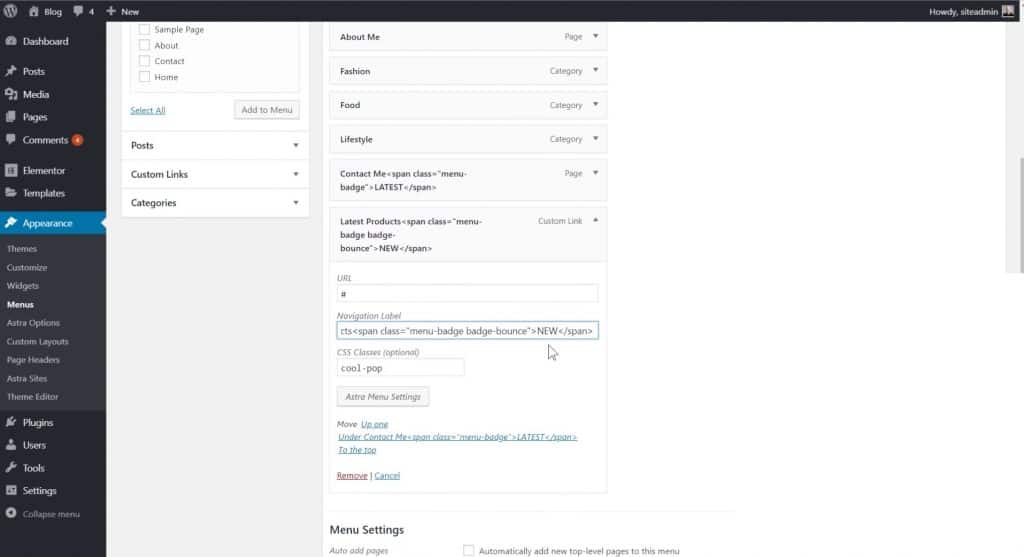
Once you've opened the menu builder, find the page you want to add the notification badge to, click on it, in this example we'll insert it into the Contact Me page, and insert the line of code from the image below.
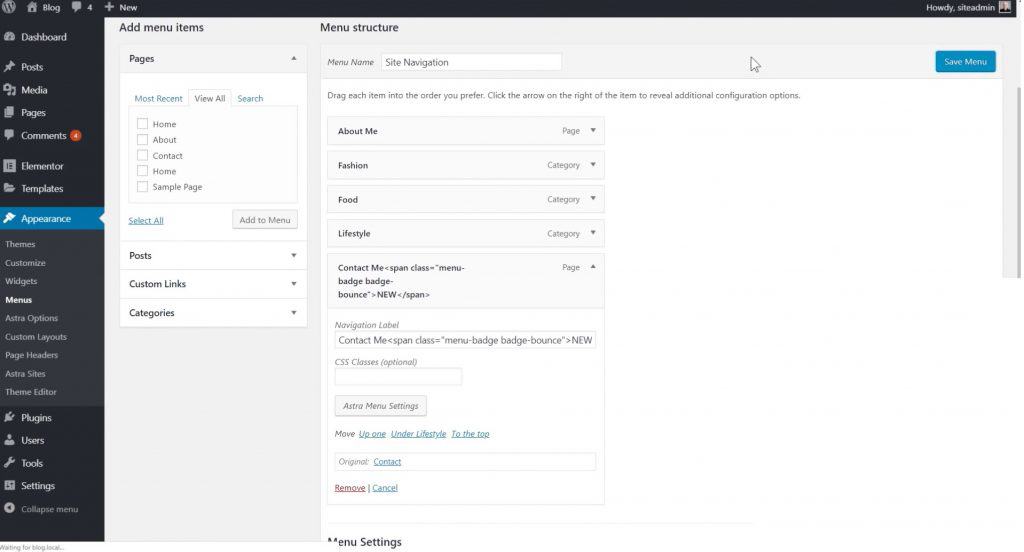
After you have done this, the appearance of the notification badge in the menu is the same as in the first image in this text, except that the badge is located next to the Contact Me field in the menu. In case you don't want the badge to bounce, you need to remove the part where it says badge-bounce from the CSS code, both from the menu settings and from the Customize settings.
The next thing we're going to do is, when you click on the field in the menu with the notification badge, a popup will appear on your screen. This can be done using Elementor Pro supplement. You need to click on the option in the control panel Popup under the section Templates and to create a new popup.
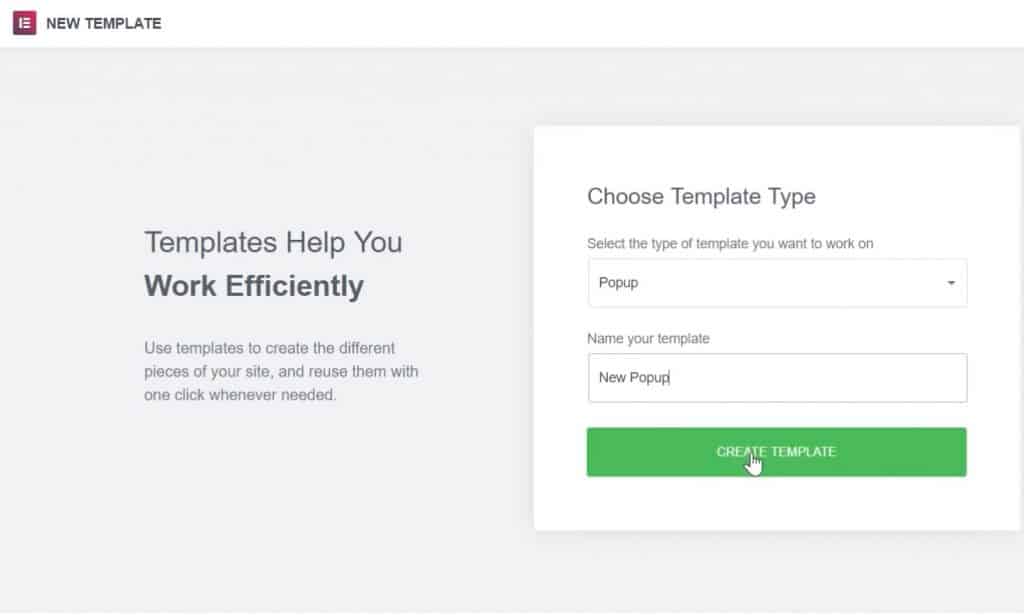
When you create a new popup, you choose the one you like from the library and then start modifying and styling the popup. Change the width and height of the popup, change the position where the popup will be located, then the animation, how it will appear on the page, background, image, text, colors and everything else you like. When you have designed the popup, you need to set it up so that it can be displayed on the page by clicking on the field in the menu. It is set up as in the following picture.
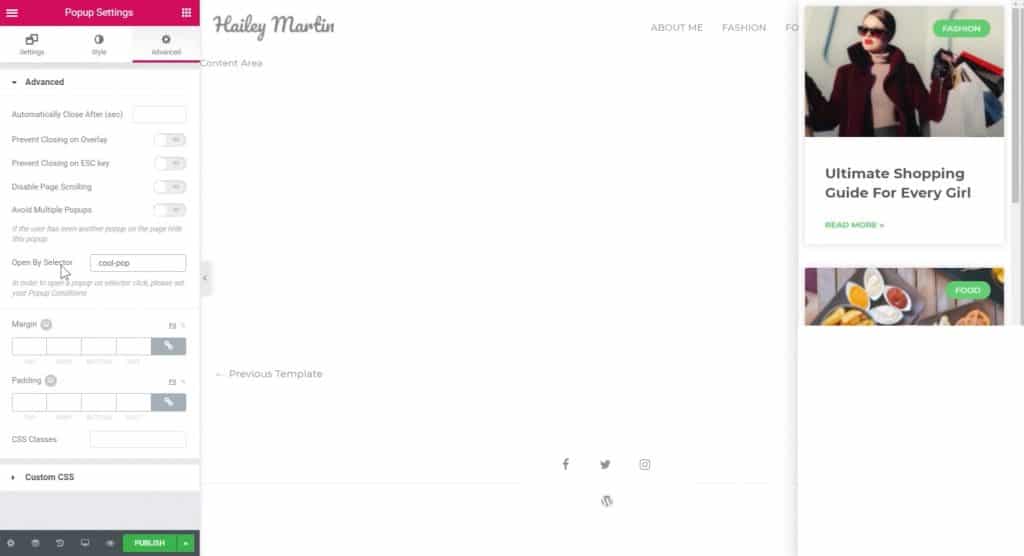
Then, click on Publish, set the popup display conditions, on which pages you want it to be displayed and click on Sava. After you have done that, you need to go back to the control panel and click on the option Menus under the section Appearance. We will add a new menu item Latest Products, adjust to her url be # in order to stay on the same page by clicking on that field and add a notification badge. Within the field CSS Classes we will set the name from the field Open By Selector from the previous picture and that's how we finished creating and placing the popup.
