When you are engaged in the creation of websites, clients are often interested in the appearance of the websites you have already created, that is, they want to see a portfolio of your works. In this article, you will learn how to add your portfolio to your WordPress site. We will show you an example of the Astra theme and its portfolio plugin, based on which your portfolio page can look like the image below.

In order to be able to create a page like this, as will be shown in the text, you need to have the Astra Pro version of the theme and also have the Astra Portfolio plugin. Once you install WordPress and the Astra theme on top of it, your site looks pretty plain at first. The first thing we will do is go to the site control panel and click on the option Astra Sites under the section Appearance.

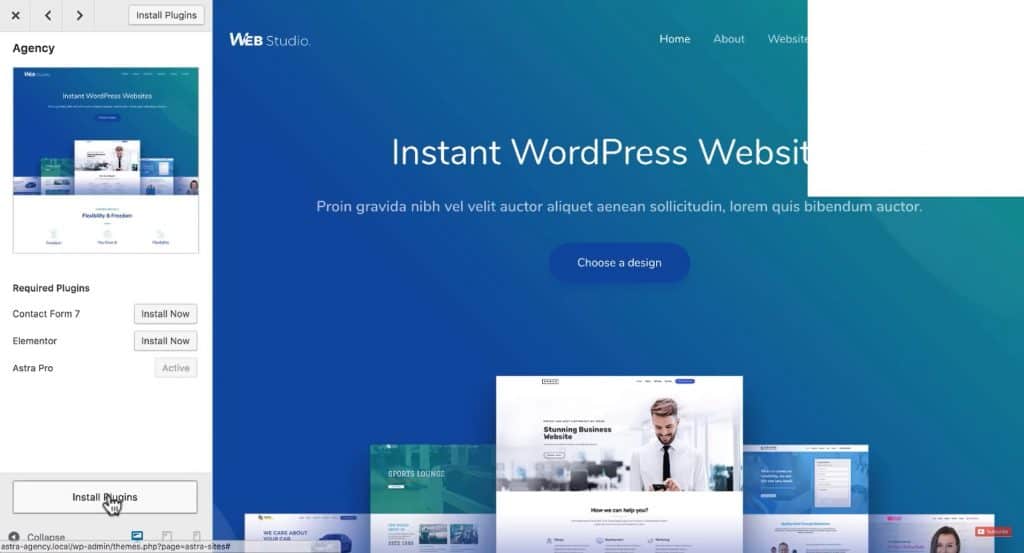
Within that you can find a site template that you like, we found an example site related to developers and we will use that template. When we open it, it shows you which plugins are necessary and you choose the option to install them, which we will do.

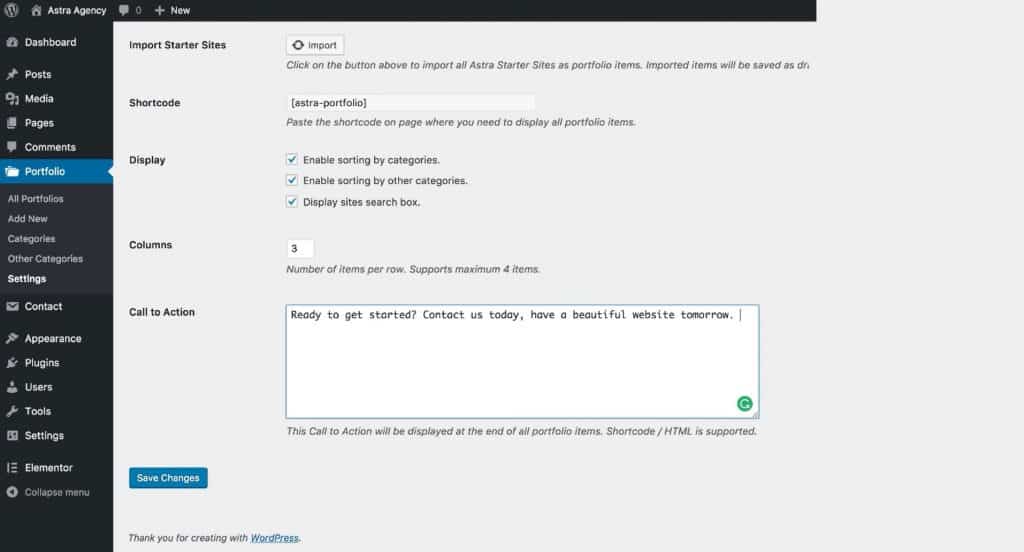
After the plugins are installed, you will be given the option to import the site, which we will do by clicking the button Import This Site. There is a page within the site Websites which represents a portfolio, but since it's not clickable on every site, we'll insert our portfolio instead. When you install Astra Portfolio plugin, a section will appear in your control panel Portfolio and there we choose an option to begin with Settings.

Within that we will click on the button Import, with which we will import the portfolio page to the site with all Astra templates, on the basis of which we can create generic sites, by only changing the images and text. Sorting by categories can be granted as well as search option enabled. You also have the option to select the number of sites per row to be displayed as well as to create at the end of the page Call to Action, by writing some text or inserting Shortcode with CTA created in Elementor or HTML code. After you are done with that, click on Save Changes.

When you open the section Portfolio, you will see that all the example sites have been added to the portfolio, but they have been added as Draft. You need to install all examples on Published, in order to be displayed on the site, which we will do. When you're done with that, you can edit the description of each one, e.g. to change the name of that example site, the name of the URL, the category to which the site belongs, or the featured image.

If you want to add a new example to the portfolio, you will click on Add New and you'll give it a name as well as a url name, category and everything in order. In order to display a finished site in a good way, we will install a Google Chrome extension Full Page Capture and when we install it, we can take a screenshot of the whole site and that way we will get a good image for the portfolio. Once you've done that, set that image as a featured image and we've added a new example site to the portfolio. After that, we will copy Shortcode of the portfolio that we will insert on the website page using Elementor.

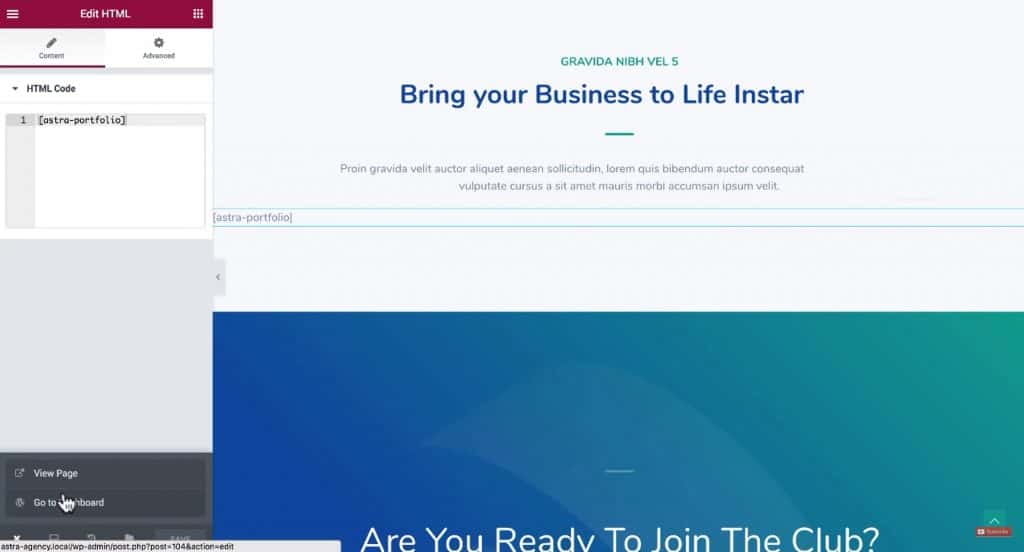
You find the HTML element, drag it onto the page and into the field HTML Code copy and paste Shortcode. You save what you have done and click on View Page to view the page. This is how we created a portfolio page.


